Hiking Yeongbong Peak in Bukhansan: A Guide to the Uiryeong Trail
If you’re looking to spend a day in nature, you might want to consider hiking Yeongbong Peak in Bukhansan.
Bukhansan is famous for scenic hiking trails and is actually one of the most visited parks in the world due to its accessibility from Seoul.
I’ve always wanted to do a hike in Bukhansan, and I was excited when it finally happened. To be honest, I wasn’t quite sure what the hike was going to be like, but I just wanted to do it.
Funny story. I had actually aimed to hike to Baegundae Peak, but we were dropped off at the wrong entrance because we took a taxi, as we had woken up later than expected.
Eventually, I found myself at the start of another advanced hiking trail, at the Uiryeong Information Center. I was supposed to go to the Bukhansan National Park Baekundae Exploration Support Center …
So the plan changed on the spot, and thanks to the mountain ranger, I eventually hiked up Yeongbong Peak, and from there I could still make my way to Baegundae Peak.
To be honest, the route was super scenic and one of the best trails I’ve ever done, especially during the autumn foliage!
Disclosure: Some of the links below are affiliate links. I may receive a small commission if you purchase through my links, at no extra cost to you. I hope you find the information useful and will continue to support me in providing quality articles and travel guides.

Hike At-a-Glance: Yeongbong Peak (Uiryeong Trail)
This is one of the more secluded trails to hike in Bukhansan Mountain, allowing you to focus on nature and scenery. So if you’re into nature and scenery, trust me, you will fall in love with this one!
- Type of Trail: Loop
- Length: 6.8 km (approx. 4.2 miles)
- Elevation gain: 600 m (approx. 1,970 feet)
- Estimated Time: 3–3.5 hours
- Difficulty: Moderately Difficult
- Starting Point: Uiryeong Information Center (via Seonnusa Temple)
- The Loop Trail: Yongdeoksa Temple – Yeongbong Peak – Bukhansan Ui Ranger Station
When to Hike Bukhansan
The best times to hike Bukhansan are during the spring and autumn seasons. Both seasons offer nice, chilly, and comfortable weather for hikers.
Autumn offers a nice scenic view of autumn foliage, from green leaves to a radiant yellowish-orange kind of landscape.
Spring offers a season of blooming flowers with a pleasant temperature.

Summer is fine too, but it can be hot and humid. Regardless of the weather, it still offers beautiful scenery.
Pro Tip: The best time to go is actually during the early mornings on weekdays with fewer crowds. Sometimes, even by 9:00 AM on weekdays, you can see a lot of people heading towards the entrance of the national park. Try to avoid weekends as the national park tends to be very packed with locals and foreigners.
How to Get to the Trailhead (Learn From My Mistake!)
Getting to the right trailhead is the most important part of your plan! Because I took a taxi to the wrong spot, I ended up on an amazing, secluded trail.
This gives you two choices:
1. To Hike My Accidental (and Amazing) Trail
Your starting point is the Uiryeong Information Center (우이령탐방지원센터 – Kakao Map).
- By Subway, then Taxi (Recommended): The easiest way is to go by subway first. The nearest station is 북한산우이역 (Bukhasan-ui Station) on the light green 우이신실 (Uisinsil) line. Once you arrive, I strongly suggest taking a taxi to the entrance linked above.
Why a taxi? From the subway station, you will need to walk uphill for at least 40 minutes (over 2 km / 1.25 miles) to get to the Uiryeong Information Center. There is nothing much to see, which is why a taxi is the best option.
Taxi Tip: Flag down a taxi or use an app like Kakao T or K-Ride (I used Uber as it was a lot cheaper). Save this address on your KakaoMap to show the driver: Uiryeong Information Center (우이령탐방지원센터).
2. To Hike the Traditional (and Busier) Baegundae Peak Trail
If you still want to hike Baegundae Peak, your starting point is the Bukhansan National Park Baekundae Exploration Support Center (북한산국립공원 백운대탐방지원센터 – Kakao Map).
- By Subway & Walk: Head over to 북한산우이역 (Bukhasan-ui Station) on the light green 우이신실 (Uisinsil) line and take exit 2. From there, it is a 2 km (approx. 1.25 miles) walk (about 30 minutes), but unlike the Uiryeong path, this option is great. You’ll be accompanied by a row of shops, restaurants, public bathrooms, and hiking supply stores. It’s a good way to see the hiking culture and grab last-minute supplies.
- By Taxi: You can also take a taxi here. Save this address on your KakaoMap: Bukhansan National Park Baekundae Exploration Support Center (북한산국립공원 백운대탐방지원센터)
My Experience Hiking the Yeongbong Peak (Uiryeong Trail)
The Uiryeong Trailhead & The Ahjussi
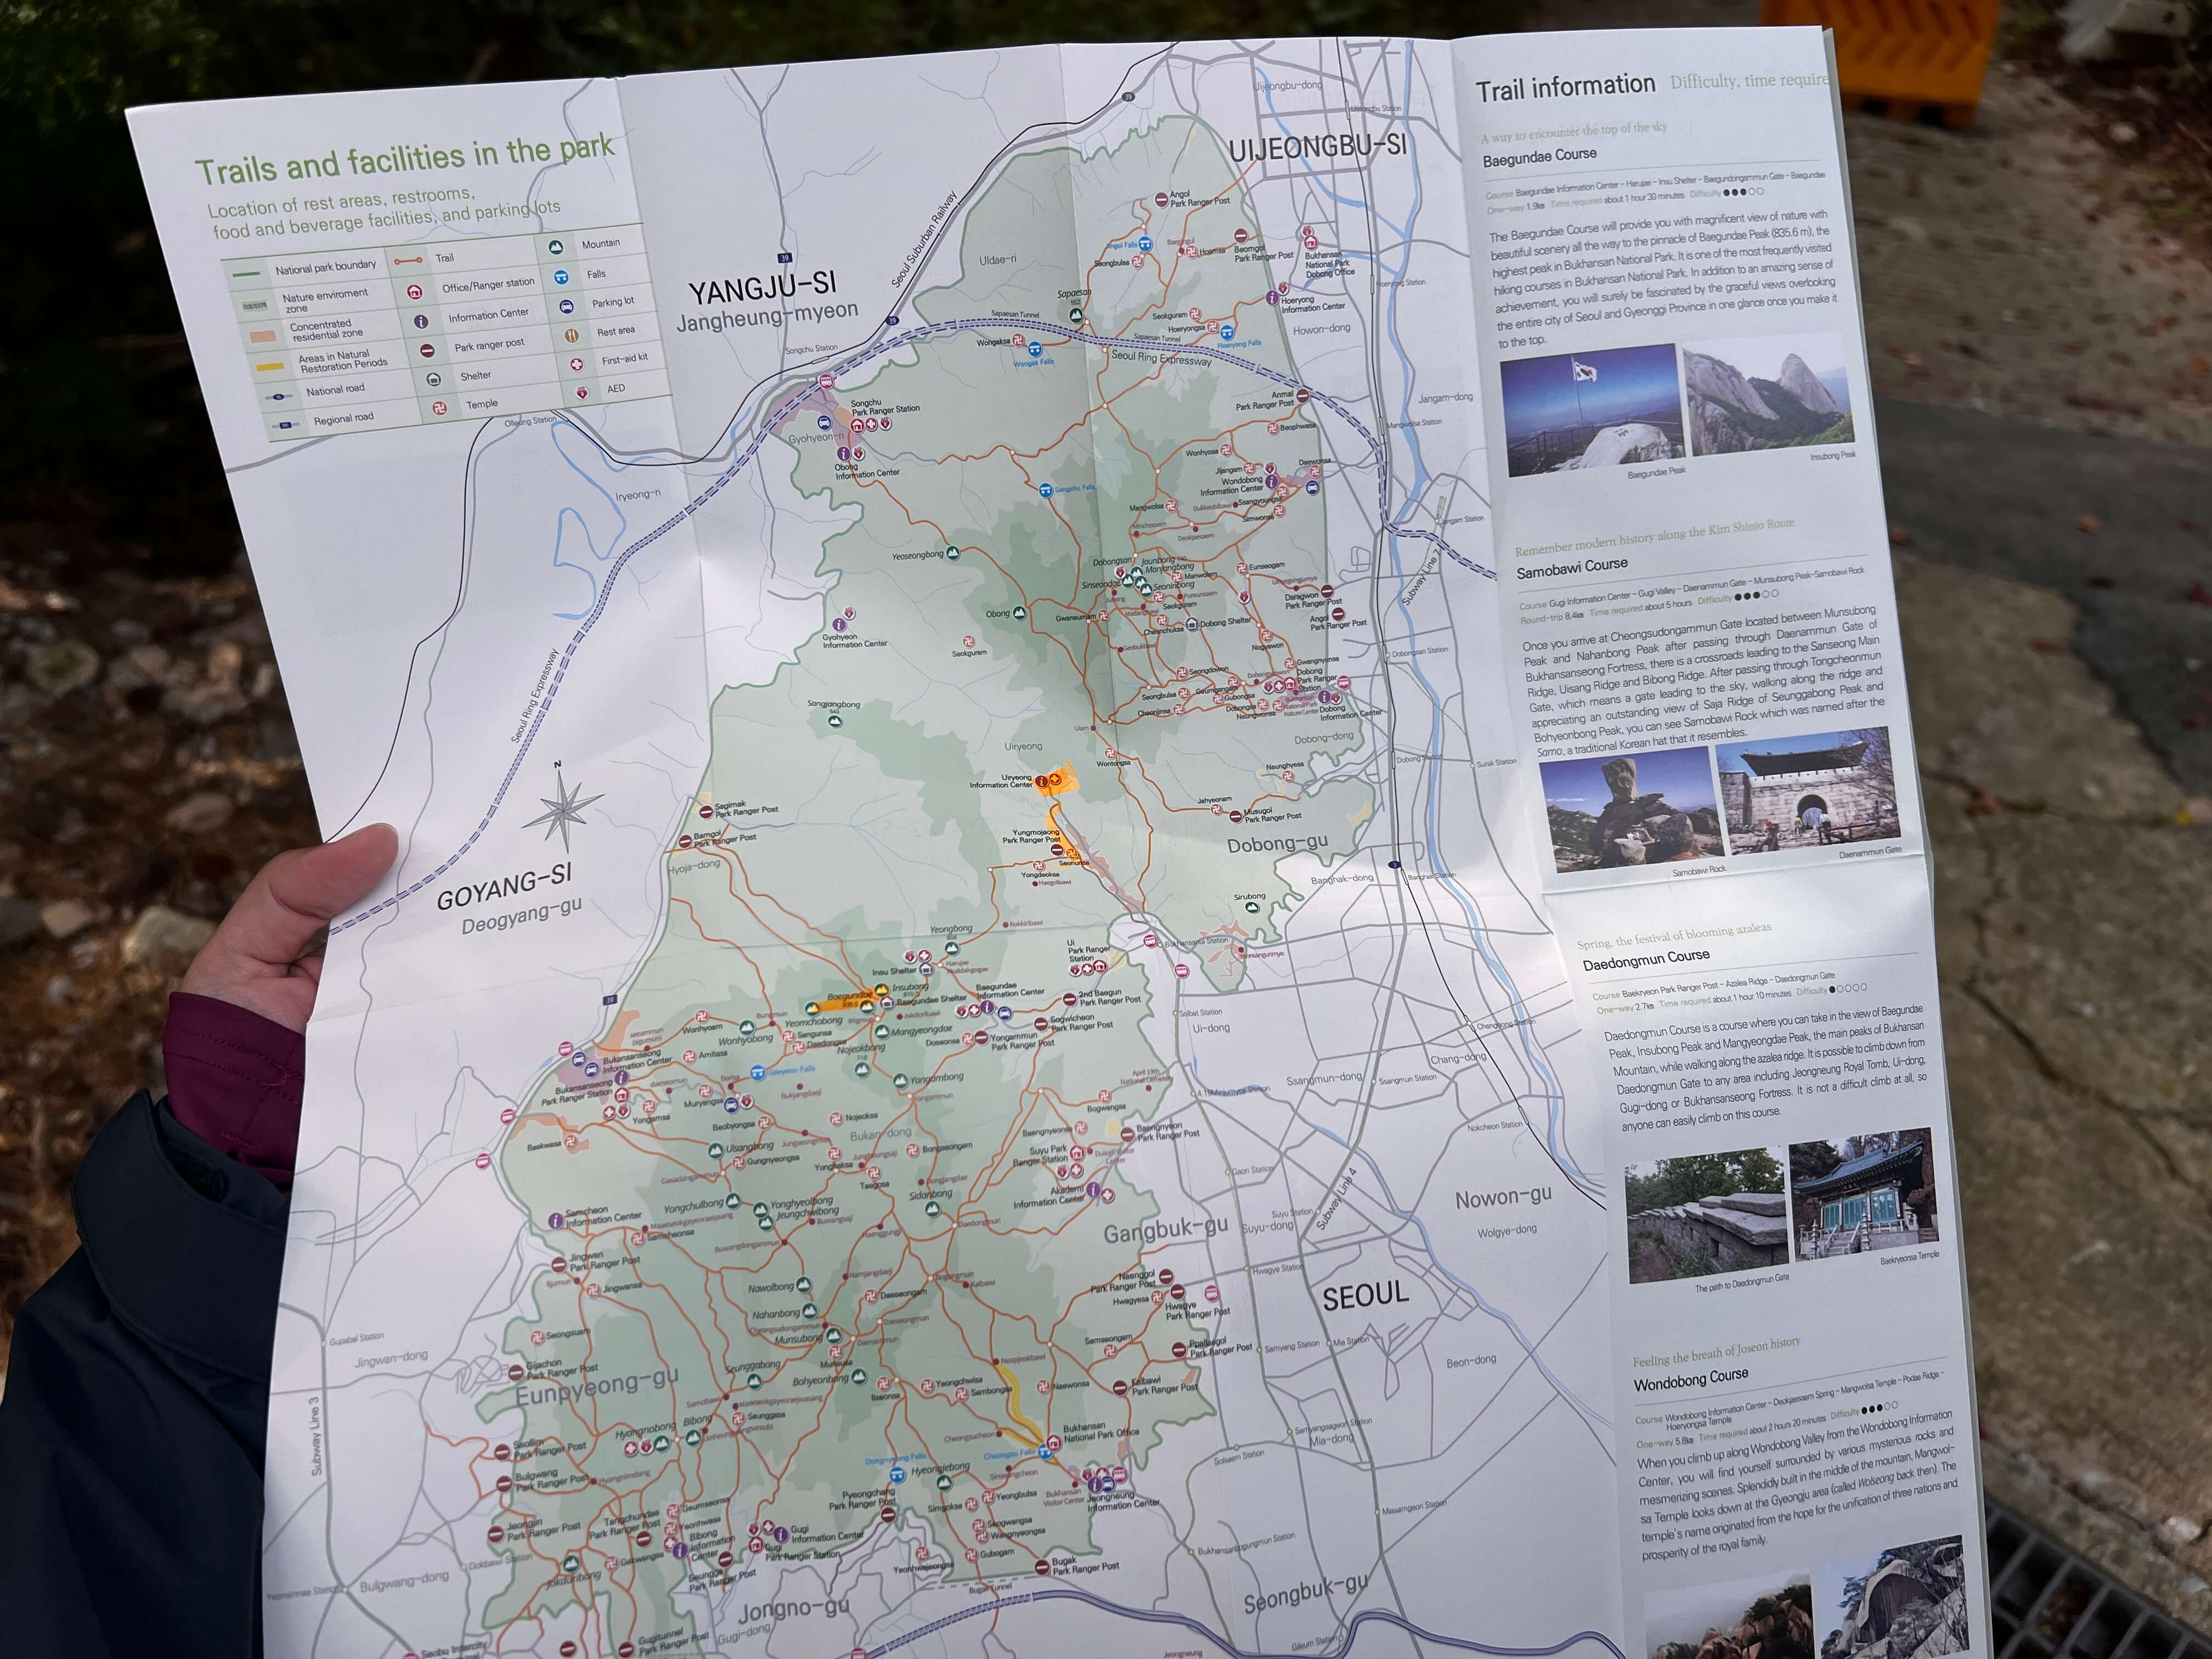
When the ranger told me that I was at the wrong entrance, he gave me a map and showed me where I was and the trail to take to go towards Baegundae Peak.
But it has to be through the Uiryeong trail first and then later join in the Baegundae trail.
I looked at my husband, and he looked at me. We were both quite lost and confused, but oh well, we made do with what we had.
There were no other foreign travelers apart from my husband and me on the day of our hike. From the Uiryeong Information Center, we walked down towards Seonusa Temple.
There, we managed to ask an elderly couple about the trail before we kicked off the hike, in our broken Korean.
The ahjussi (elderly man) didn’t seem to be happy that we wanted to do the trail. I didn’t manage to catch everything that he said. To recap, he said it was difficult, very hard, the trail goes up and down, up and down.
The wife then added that we should have sufficient food and water in our bag, but I reassured her that everything was already prepared in my backpack. We said thank you and bid goodbye to the lovely elderly couple.
The Temple Path: Seonnusa Temple to Yongdeoksa Temple
As we kicked off the hike, the path was clearly indicated, and it had a nice, gentle start.
Upon reaching Seonusa intersection, we took the way up to Yongdeoksa. You’ll see the toilets as you head up. I recommend that you empty your bladder here, as it will be the last one on the trail. The first checkpoint will be the Yongdeoksa temple.

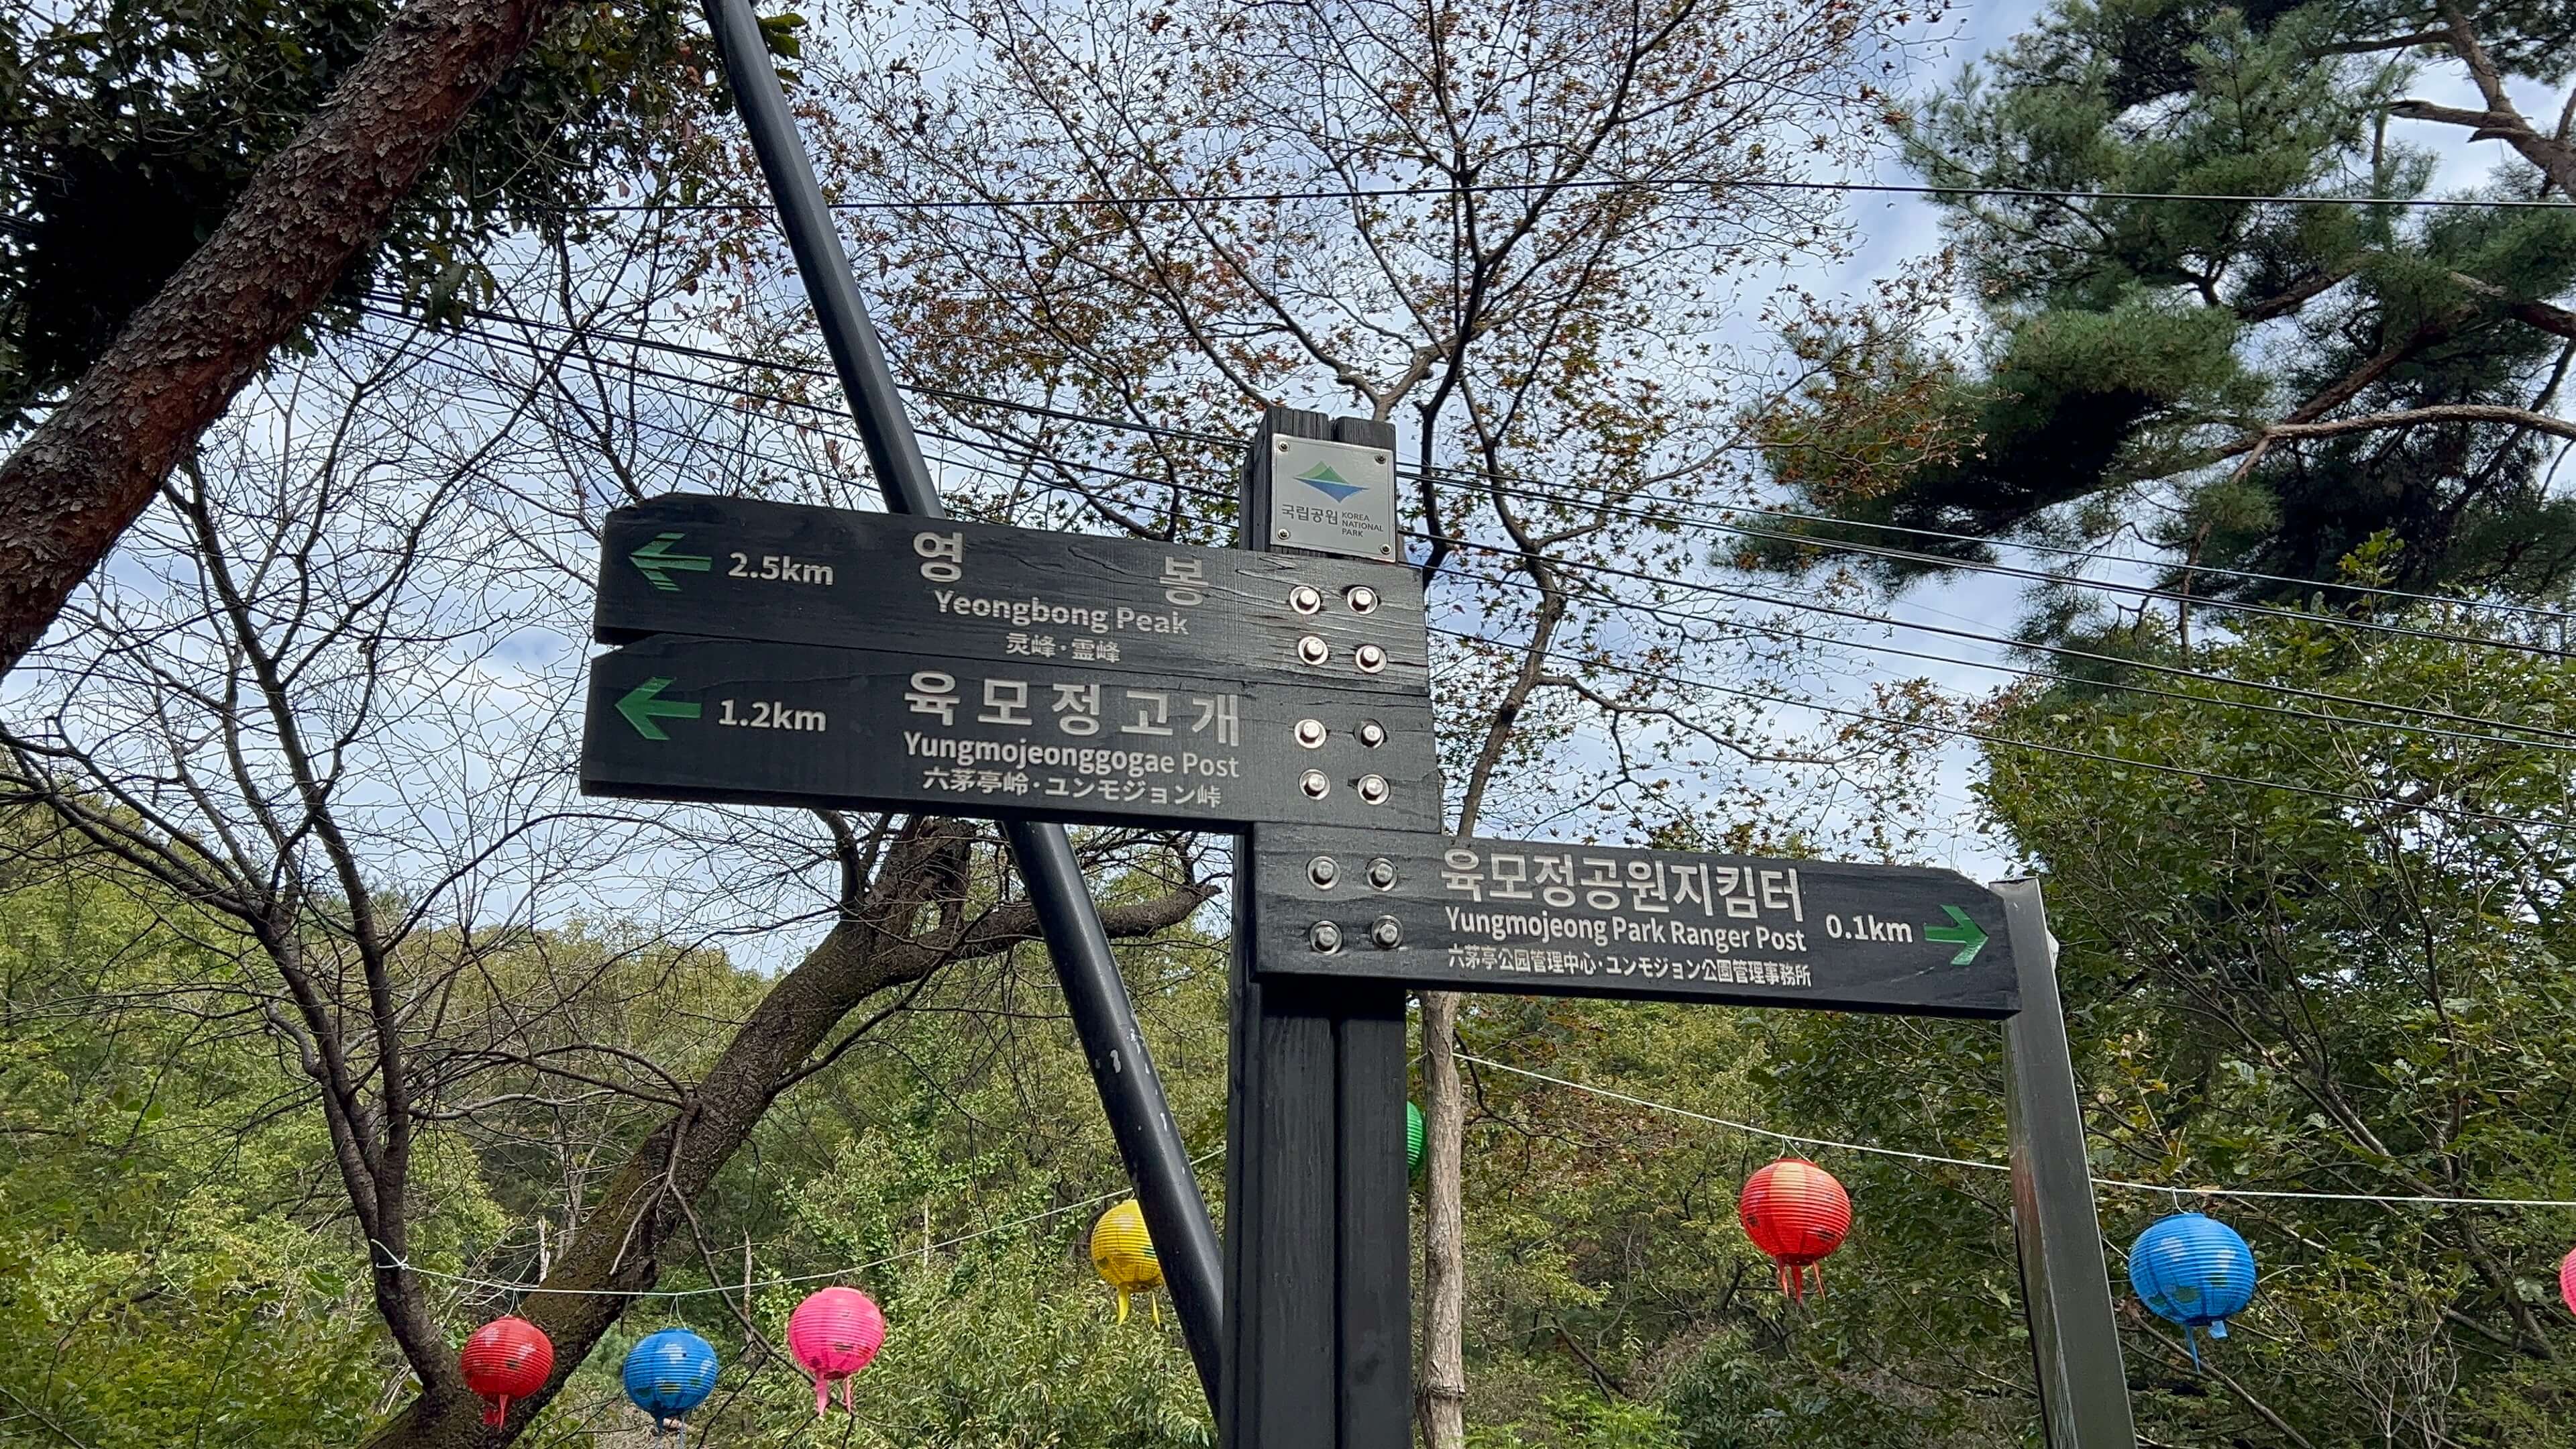
The Forest Path: Yongdeoksa to Yeongbong Peak
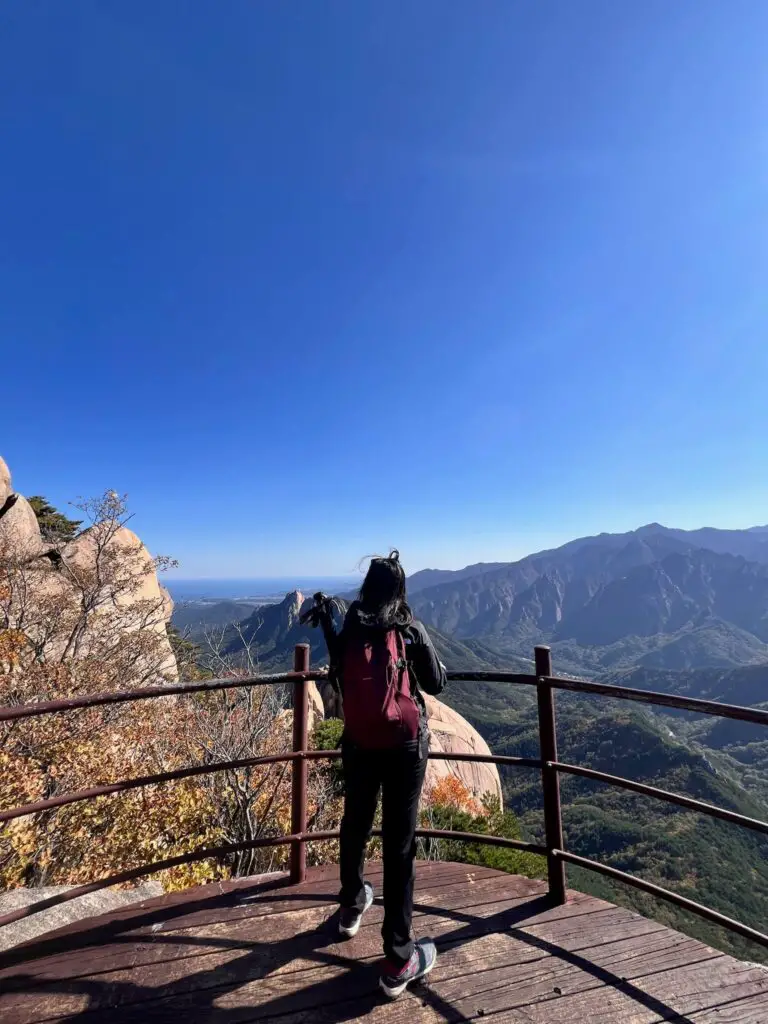
From there onwards, follow the trail towards the Yeongbong Peak. What I love about this stunning pathway is that it will take you to the pinnacle of Yeongbong Peak, while boasting the panoramic views of the northern part of the city and the towering mountains surrounding it.
Some corners show you a part of Seoul with tall buildings and apartments from far, and other corners feature tall majestic mountains that are too beautiful to even describe, especially during the autumn foliage.
If I can describe the trail, the elevation is 600 m, but the inclination increases gradually with a lot of ups and downs. In a way, it helps you to rest a little bit from time to time without attacking the inclination all at once.


It’s a series of surprises while hiking Bukhansan Mountain.
Some pathways are covered with piles of neatly arranged stones, some parts were just dirt trails with a clear indication of where to go, and some parts have a massive slab of stone that makes you think that you’re lost for a moment.
But actually, you’ll need to cross it over by holding onto the rails and pulling yourself up!

Plus, along the way, there were only local hikers, bumped into one or two foreign hikers, but most of them are locals with full gear, and of course, a bottle of makgeolli! 😉
Made a quick connection with two lovely Korean ladies who were alongside us from time to time.
Again, I don’t understand everything they said, but we were collaborating in taking pictures of one another at different scenic viewpoints! I was thankful for them; otherwise, we would have only had selfies of us.
The trail may look close on your map, and it will look like you’re almost there, but keep going. Don’t let the map break your spirit.
The Reward at Yeongbong Peak
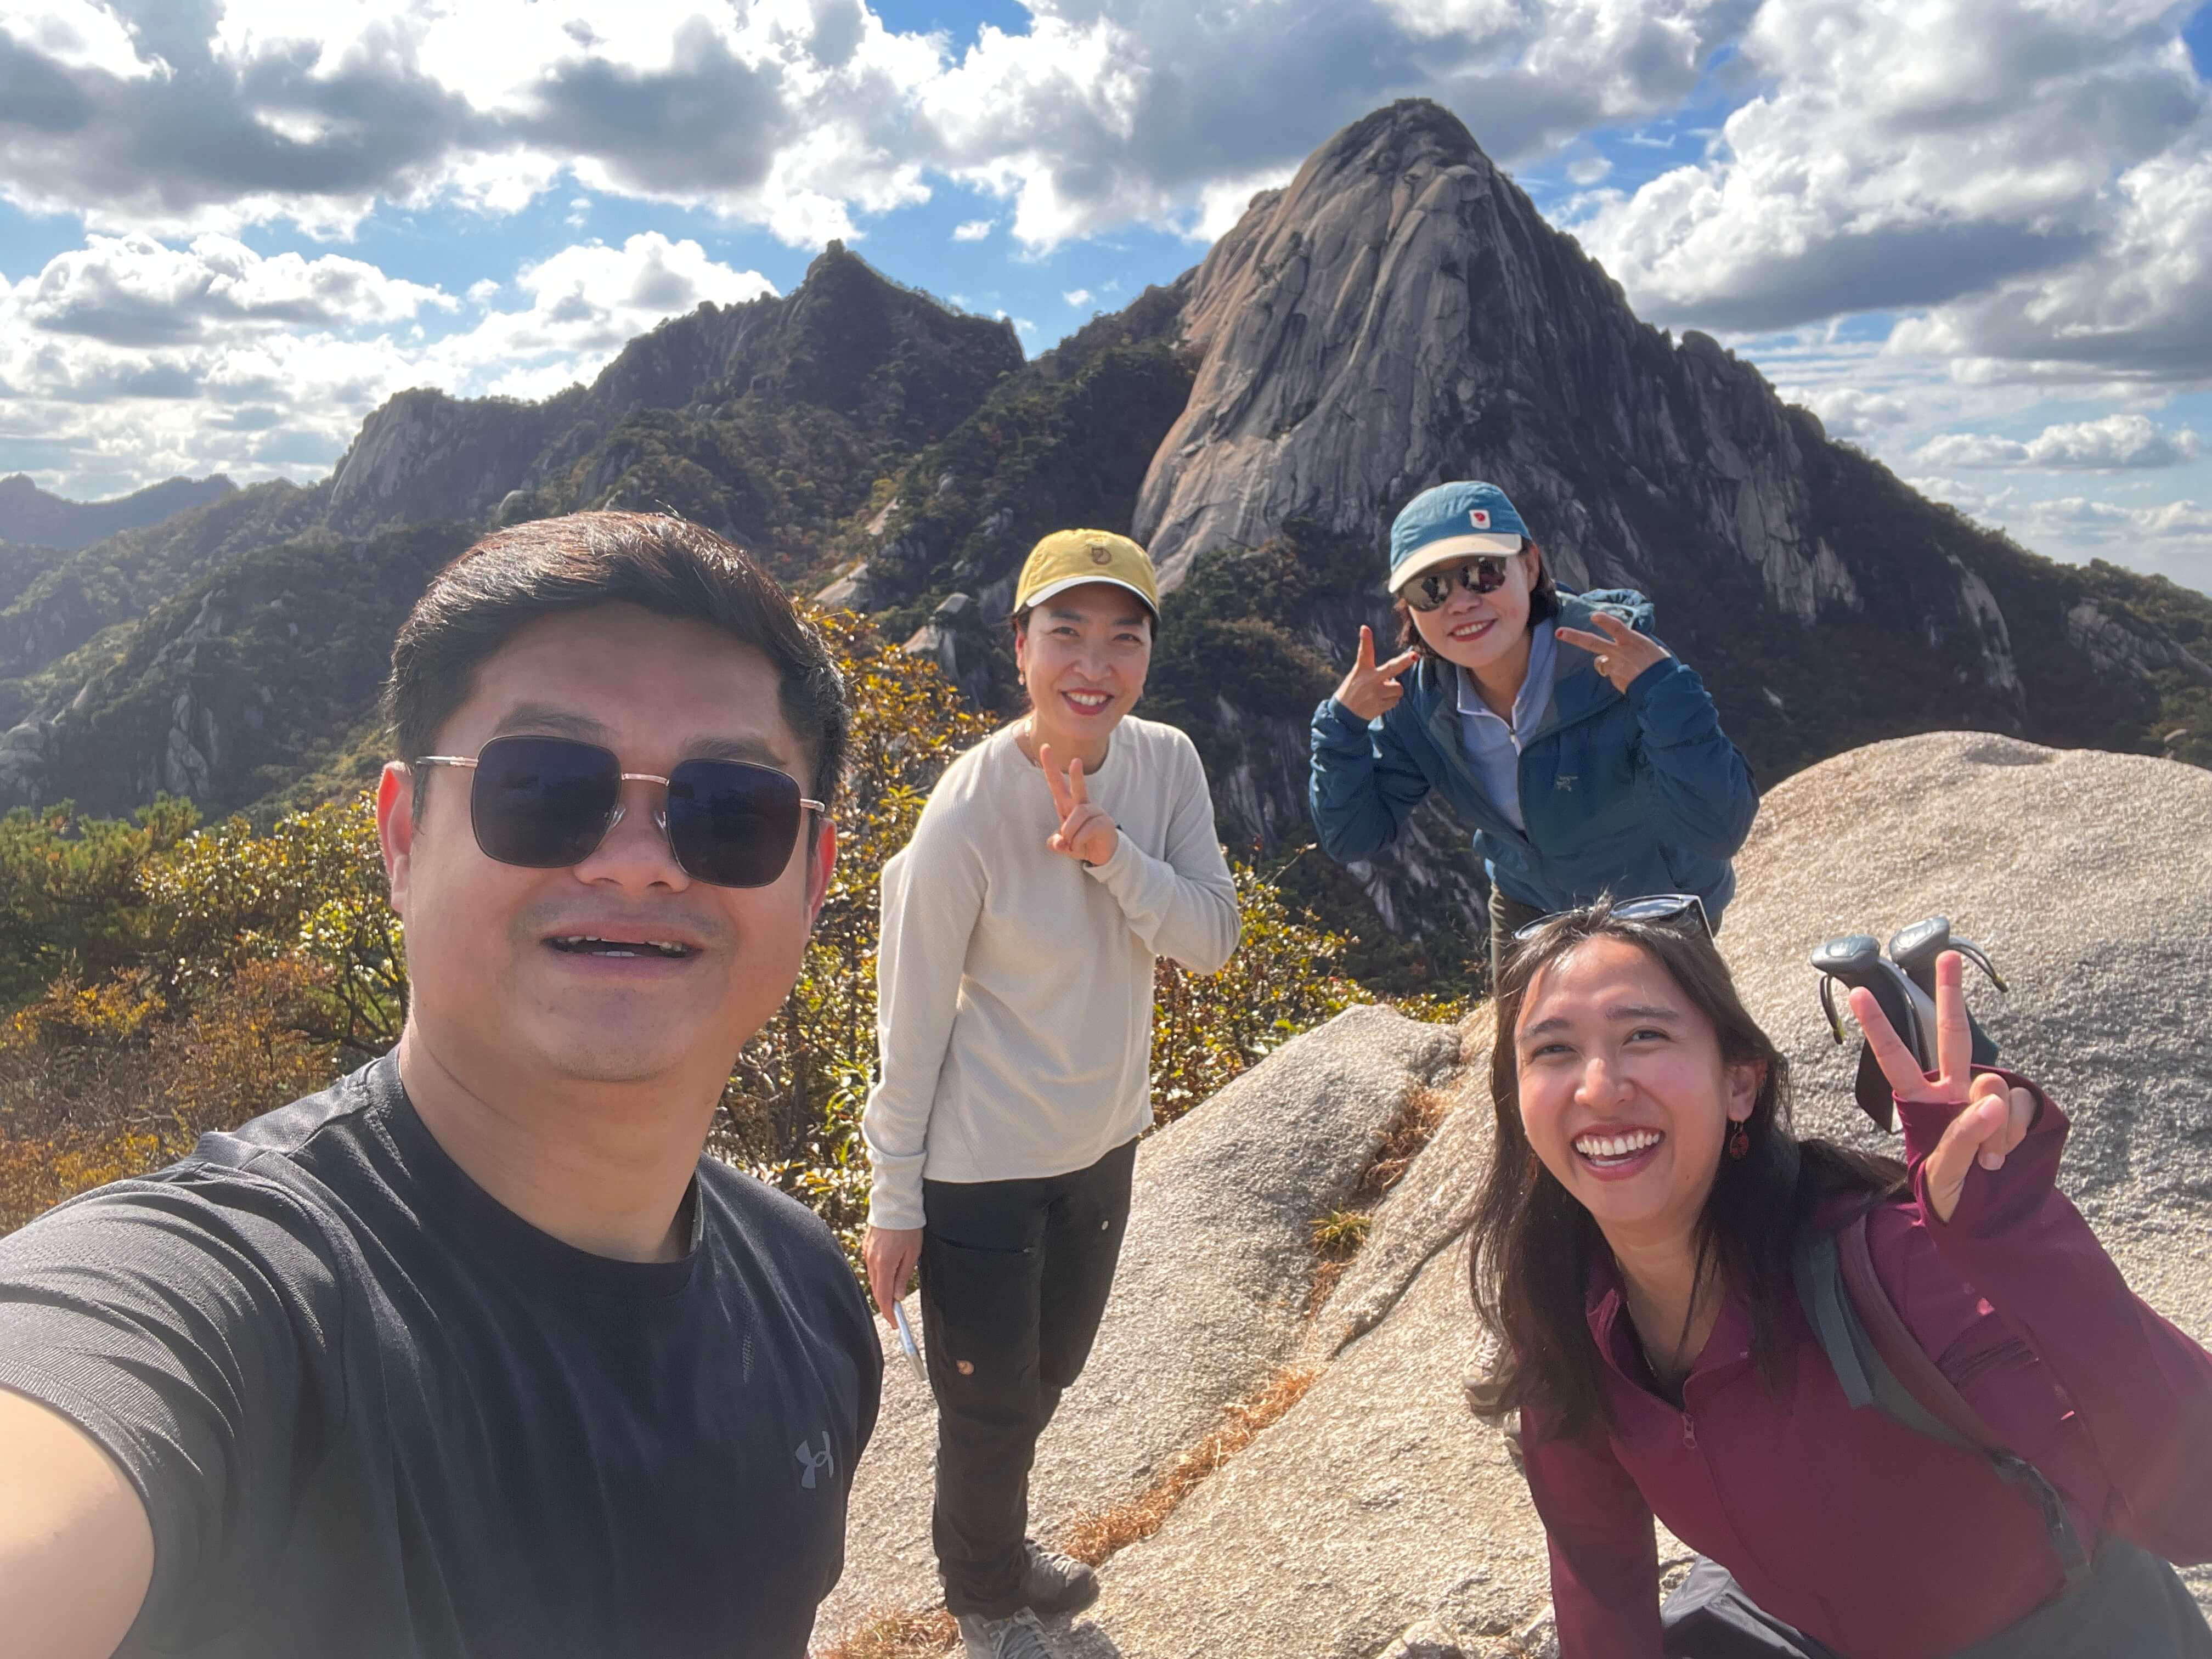
When I reached the peak, I turned to my tired husband, and both of us were just smiling. Although we were both super tired, the view was mindblowing.
Because the best part is you get a perfect view of the more famous Baegundae and Insubong Peaks. I mean, both peaks in one view while standing on another peak!

Definitely worth the climb, even though it wasn’t our initial plan. Take a break and swallow the view for a bit. Have some snacks and drinks.
Fuel up before heading down the trail, because it will only be downhill from this point onwards towards the Harujae Kkaldakgogae checkpoint.
From there, you have an option to complete the loop trail and head towards Bukhansan National Park Baekundae Exploration Support Center or continue towards Baegundae Peak.
For my case, I continued towards Baegundae Peak, which I later regretted a little bit, but that’ll be for another story of Hiking the Baegundae Peak.
If you do decide to continue to Baegundae Peak, please ensure that you have sufficient time to make it to the peak and back down before nightfall! 🙂
How Difficult is the Yeongbong Course?
I do personally think it was fairly difficult, but with a good fitness level and good health, it is feasible. A certain area requires you to pull yourself up with only handrails.
So if you don’t have good hiking shoes, you may have a hard time climbing and crawling up.
Also, if you have a knee problem, I do not recommend that you do any of the intermediate or difficult trails that can harm your knees even more.
Hiking poles with shock absorption help to reduce the impact on your knees, but I still don’t recommend them to you if you’re just doing this for fun.
Compared to Baegundae Peak, the Yeongbong course is much better starting from the Bukhansan Ui Station, Yongdeoksa temple, and ending at the Bukhansan National Park Baekundae Exploration Support Center.
If you do eventually start at Bukhansan National Park Baekundae Exploration Support Center to reach the Yeongbong peak first, then only go down to Yongdeoksa, you will be climbing all the way to Yeongbong peak once you reach the Harujae (하루재고개) checkpoint, which can be really tiring.
Tips for Climbing Bukhansan
Here are some tips that I gathered from the locals and other bloggers out there:
- Have good hiking shoes with a good sole and grip. I am very amazed by how the Korean National Park Service (KNPS) laid out trail paths… but I do think that hiking shoes are non-negotiable. Some parts that I encountered had granite slabs and boulders… It can be slippery! Also, hiking sticks come in handy. You can rent them at Seoul Hiking Tourism Center.
- Don’t be surprised to see how underdressed you are compared to the local hikers. You’ll see them with full gear head to toe… At first, I thought it was exaggerated, but by the end of my hike, I understood why they had it.
- Bring a sufficient amount of food and water. Bring extra if you’re planning to do a long trail… I underestimated my stock of food… it would have been good to have extra supplies.
- Get to the right entrance trail. Don’t be like me. What I planned and what I ended up doing was simply because I pinpointed the wrong drop-off location by taking the taxi.
Pro Tip: You’ll have aches and pains the day after your Bukhansan hike. So, book yourself a trip to a Jimjilbang (Korean bathhouse) for the following day. Trust me, your body will thank you, and this is a once-in-a-lifetime experience ;)!

Is the Yeongbong Peak Hike Worth It?
Yes, definitely worth every picture I took. I know that Baegundae Peak is famous for its foliage and intense trail, which I did after I reached Yeongbong Peak.
But if you want a rewarding, challenging, and stunning Bukhansan hike without the insane crowds of the main peak, then Yeongbong is the perfect choice.
It is fairly manageable with a trail map on your phone, and I love the fact that there were fewer crowds than at Baegundae Peak.
While the ahjussi I met earlier at Seonusa temple told me that the trail is challenging, I do find it less difficult than the Baegundae Peak if you are starting from the Uiryeong Information Center.
It goes up and down, but you won’t feel like your soul is being sucked out alive, going all in for the nonstop elevation. Hope this helps you for your next hiking trip to Bukhansan!
Helpful Resource: For a comprehensive overview of all trails in Seoul, the city has published a fantastic guidebook. You can download the full PDF here: [Official Seoul Hiking Guide Book For All Trails]